In this post I will explain how to program am ATMega32A MCU. I really like the AVR chips, they are powerful, have enough flash and sram memory and have a lot of build in I/O devices. And the chips come in many sizes that all have the same MCU kernel, but a different number of I/O pins and different Flash/Sram sizes. If you really need a lot of I/O pins the ATMega32A is what you need, I like to use this chip and it is not that expensive. To program this chip you will need a programming environment, I use Visuals Studio PlatformIO and the old but decent Arduino IDE. Fot beginners I would recommend the Arduino IDE as it is foolproof and easier. With PlatformIO you can control much more (like all the fuse settings in binary format) but if you do something wrong you can get totally unusable bricked MCU chips. On this page I describe the Arduino IDE with an Arduino Uno as ISP programmer.
ARDUINO IDE

I really liked the Arduino IDE until the last versions. The (configuration / libraries) directories it uses are all over your disk and hard to find. That is why I recommend the portable arduino-1.8.19 version. This has all the files in a single directory. Install this version somewhere on your drive and it works out of the box. But out of the box it does not support the ATMega32 processors. There are several solutions that depend on your version of the Arduino IDE, find one that fits your IDE and install it. I have included this standard in my portable version of the Arduino IDE.
Arduino Uno as ISP
I have bought a lot of Arduino programmers when I first started and I had a lot of problems with them especially the Chinese clones. Then I discovered the Arduino Uno as ISP and build several shields for 8, 14 , 20 and 28 pins AVR chips. Because all the different sizes of chips have their programming pins on different pins and need the power pins also connected, I build several shields. But they are cheap to make. Hier is the schematic of the shield I use for the ATTin24 processor.

I use a standard prototype shield and a ZIF header for this, then first upload the Arduino as ISP scketch to the Arduino Uno. Select the AruidnoISP sketch from the examples and select Arduino Uno as board.


Connect the Arduino Uno using the USB cable and select the correct port in the Tools settings. Then use the Upload button to upload the ArduinoISP sketch to the Arduino Uno and your ISP programmer is ready.

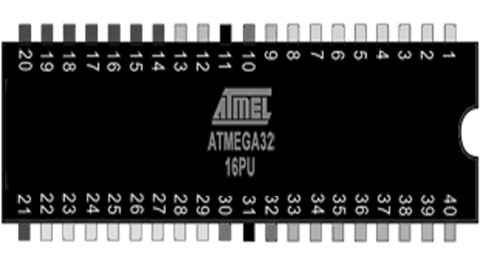
Programming an ATMega32A
First we start by loading (or writing) the sourcecode file of the ATMega32 code in the programming language C in the Arduino IDE. Then go to the tools setting and select the correct device. Under tools select the configuration of the ATMega32A you will use, in my case an ATMega32 with external 16 Mhz clock.
// -----------------------------------------------
// Blink for ATMega32A
// H.M. Pragt 2022
// -----------------------------------------------

#ifndef F_CPU
#define F_CPU 16000000UL // 16 MHz clock speed
#endif

#include <avr/io.h>
#include <util/delay.h>

int main(void)
{
  DDRD = 0xFF; //Makes PORTD as Output
  while(1) //infinite loop
  {
    PORTD = 0xFF; //Turns ON All LEDs
    _delay_ms(2000); //1 second delay
    PORTD= 0x00; //Turns OFF All LEDs
    _delay_ms(2000); //1 second delay
  }
}
Now the last setting is selecting to use the ArduinoISP programmer:

Connect the Arduino Uno with the shield and the ATMega32A chip inserted to the computers and select upload button to program the code into the chip. As easy as that, happy programming.
I hope this was clear, if you got anything to add to this post then let me know, regards, Hein Pragt.
